Introduction
Design visualisation animation generally involves animation of cameras in walkthrough, panaround or flyover movies to give the client a much richer and more informative view of the design. The creation of a walkthrough is covered in Key Fundamentals to give an introduction to the basic routine of setting up a path and animating a camera through time at the correct speed. Once this has been mastered you will want to increase your production skill by using more of the advanced animation tools and techniques MAX/VIZ has to offer
TIP: Walkthroughs are not necessarily the best method of showing clients the design points in a scheme as long walkthroughs are particularly wearing to the viewer. For 'journeys', along routes they are effective, however.
Try to use a variety of panarounds, walkthroughs and stills using video production techniques (there are some very reasonable packages on the market and even MS Powerpoint can deliver good results). Keep walkthrough sequences below ten seconds if possible and make them part of a presentation 'story'
Download Sample Data
In order to follow this tutorial, you may want to use the supplied files. Please read the sample data instructions before downloading.
kf413_files.zip (416kb)
module_4_maps.zip (5.2mb)
Animate a Camera along a Path
One of the first things new users want to do with their new 3D visualisation software is animate a camera along a path. Other animated objects can also be effective additions to a presentation movie. Cars moving along roads, people walking, trees blowing in the wind, leaves falling, water moving, smoke rising and clouds moving across the sky are all examples of how a scene can be brought to life with animation
This tutorial introduces you to the fundamentals of controllers, time configuration, use oftrack view (in the Mini-Curve Editor to slow and speed objects up) and the animation controlsby animating a camera along a camera path
Create Camera Path
- Open kf413_01.max. This is the completed tutorial model with materials and lighting
- Maximise the Top viewport
- Turn 3D Snaps on and change the snap settings to Face
- Create Panel > Shapes > Line > NURBS Curve > Point Curve. Draw a point curve similar to the one shown in the image below, snapping the points to the faces of the surfaces. This curve has only 4 points
TIP: Always use NURBS Curves for camera animation. Curves are much smoother than splines. Using Snap to Face allows you to create a path that follows a the surface levels
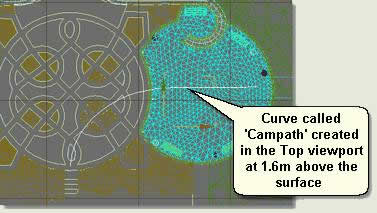
- Rename the curve Campath and move it up 1.6 on the Z axis. This will put the camera at 1.5 above the surface ie head height of an average person
- Minimise the Top viewport
Position a Free Camera and Assign a Path Constraint Controller
- Create Panel > Cameras Free Camera. Create a free camera in the Left viewport by left clicking anywhere in the Left viewport to create and right clicking to end the command
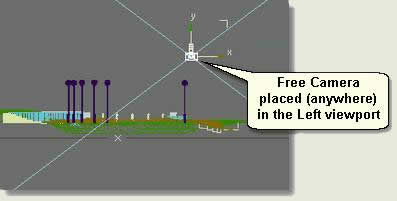
NOTE: The camera is created in the Left viewport to keep the orientation of the camera correct when animated on the path
- Maximise the Top viewport
- Select Camera 01
- Motion Panel > Assign Controller rollout. Select the Position Transform then press theAssign Controller button

- On the Assign Position Controller dialog select Path Constraint. This assigns a Path Constraint Controller to the camera

- Path Parameters rollout > Add Path button. The button turns orange
- In the viewport or by using Select by Name dialog select Campath. The camera moves to the start of the camera path curve. However it is still orietated on the X,Y axes as before
- Right click to exit the Add Path command
- Check Follow. The camera then follows the line of the camera path curve
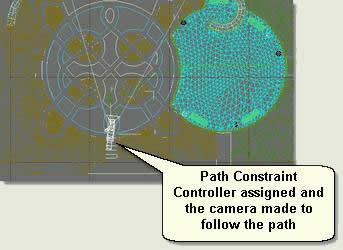
- Minimise the Top viewport and change the Front viewport to Camera 01 by typing C
- Change the Camera 01 viewport to Smooth + Hightlights and all the other viewports to wireframe
- Move the Time Slider left and right to see the animation in the Camera viewport. Also, view a quick preview in the viewport by making the Camera viewport active and pressing the Play button on the Animation Controls
TIP: The animation starts with a big curve that will be rather distracting when viewed. Try and make curves rather wide if needed. this animation needs a fundamental change of direction as well as the speed altering to suit the output required thus:
Adjust the Camera Path Line
- Select Campath and in Point sub-object mode move the points at the start of the curve to a produce a straighter line, perhaps starting with a slight bend to introduce the viewer into the scene

- Check the line by using the Time Slider
Edit Time Configuration
The camera is moving too fast along the curve. A walking pace is about one metre per second. So, if you know the length of the line and how many frames per second the animation will be played back at, then you can quickly work out how many frames are needed for the animation
- Utilities Panel > More button > Measure. Use this tool to find out the length of the line and record this value. The line is, say, 22 metres long. Walking at 1 metre per second means that it will take 22 seconds to walk the length of the line. If the amount of frames per second is set to 25, then the animation will need 22 x 25 = 550 frames to cover the 22 metres at 1m per second
- Animation Tools > Time Configuration dialog. Check Custom for the Frame Rate and type 25 in the FPS (frames per second) box
- Press Re-scale Time to open the Re-scale Time dialog. Change the End Time to 550then press return and OK
NOTE: A common mistake is to change the number of frames in the Animation section of the dialog. This will have the effect of moving the animation to on end of the time slider ie the speed will not be changed. The Rescale Time button must be used
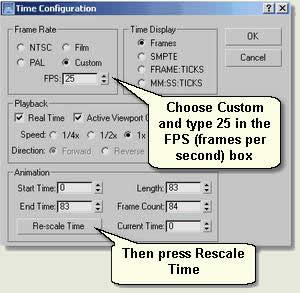
- Note that the Time Slider has now 550 frames
- Play the animation again in the Camera viewport to initially test. Press Esc to stop an animation in the viewport
Edit Track View and Preview
The animation is a little 'cluncky' because it starts and stops straight away and does'nt speed up to walking pace and then slow down at the end to a stop. Use the Mini Curve Editor to edit the start and stop of the animation and thus produce an 'easier' animation to view
TIP: Only panaround animations should start and stop straight away as these may be required to 'loop' on playback
- Select Camera01
- Animation Controls > Open Mini Curve Editor (bottom left of the Time Slider)
- Right click on Percent and select Assign Controller

- Choose Bezier Float. This makes the Percent curve 'curved' and not linear
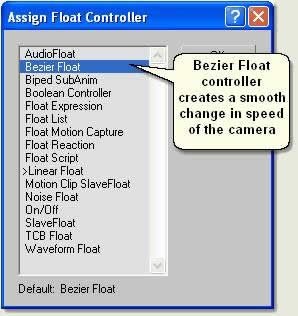

Tips on using the Mini Curve Editor
- Use the Playback controls to run the animation in the Active viewport and adjust the number of frames if needed using the Time Configuration dialog
 Add Keys where the speed changes, for example when stopping at a junction and then moving off. Move the blue time slider and add keys in the space between the two lines
- When stopped the curve should be perfectly flat. Copy and paste the Percent value from one key to another to achieve this accurately. Also, right click over any key to adjust the in and out curve shape
- Use the mouse Pan and Zoom and the Zoom Horizontal Extents
 and Zoom Value Extents
  to navigate in the Mini Curve Editor
TIP: If the camera appears to 'turn around' at the end of the camera path move the last key down slightly below 100 percent
TIP: If the camera experiences shaking when rendered and a curve is used for the camera path, the problem is most probably caused by the fact that the site is far from 0. The accuracy of MAX/VIZ is only 32 decimal; places and not 64 like AutoCAD. This is a common problem with infrastructure and landscape schemes as many are positioned using real-world coordinates. As explained in 'AutoCAD Drawing for 3D', the scene data will need moving nearer to 0 to stop this problem

No comments:
Post a Comment