Introduction
Putting a scene into an 'environment' is important, not least to generate a feeling of 'outdoors', a 'sense of place' or mood. This tutorial takes you through the process of applying a sky background. Other techniques for creating a panaround site background, camera matching a site model to an existing site photograph or creating atmospheric clouds are not covered by Key Fundamentals
Download Sample Data
In order to follow this tutorial, you may want to use the supplied files. Please read the sample data instructions before downloading.
kf411_files.zip (406kb)
module_4_maps.zip (5.2mb)
- Open kf511_01.max. This scene has a camera view setup looking over the wall into the horizon
- In the Material Editor select an available sample window and name the new material Sky
NOTE: You are going to create a sky material to give you the ability to manipulate the sky background by changing parameters in the Material Editor
Creating a sky background
- Create an image mapped material for Sky using the bitmap Sky 15.jpg. This image has been taken using a digital camera and stored for just this purpose
- At the map level change the type of mapping to Environ and make sure it is set toScreen
![]()
- Click Go to Parent and then open the Environment dialog. Keeping the Material Editor open, and whilst at the material (top) level, left click over the Map Button to the right of the Diffuse swatch and drag to the Map button in the Background parameters on the Environment dialog. Choose Instance when prompted to copy. Then you will be able to adjust the map's parameters in the Material Editor. The name of the Sky map is displayed on the Environment Map button thus:

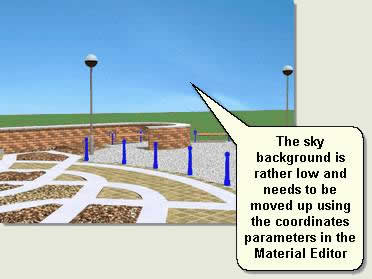
Render the scene and notice that the sky background is rather low:

You can now use the parameters for mapping coordinates in the Material Editor to move the image up and will make the image display in the viewport so the changes can be judged:
- Views > Viewport Background dialog > Background Source. Check Use Environment Background
- Also check Display Background then OK. The sky background will display in the viewport so the changes are visible without rendering
TIP: When finished moving a background image use the Viewport Background dialog to remove the sky from the viewport. The image can become rather distracting when modelling
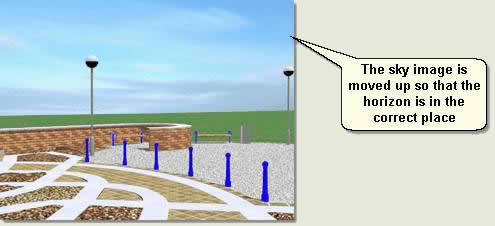
- In the Material Editor go to the map level Coordinates rollout. Change the V Offset to0.38 This moves the sky up just so the ground below in the sky image is not visible

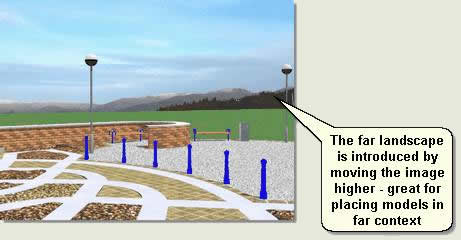
- Change the V Offset to 0.48. This brings the sky image up higher as shows the far landscape as well:

NOTE: When the camera view is changed the sky background stays as it is in the image above. So this technique is only appropriate for specific still images. Other techniques involving panoramic mapping of skies and site panaramas, sky domes and atmospheric gizmos for clouds are available for multiple images and animation. However, with good planning and the use of specific camera points on site related to specific camera points in the scene, this can be a very effective method of quickly conveying site environments

No comments:
Post a Comment