by Ian Ibbotson
Introduction
Procedural maps use computer generated effects and are applied to materials for many different purposes. They have to be scaled and positioned on the object using a UVW Map modifier or aMap Scaler modifier. In this exercise you will produce and assign a gravel material for the sundial surface and meadow path using a Noise procedural map and a step and flag material for the steps and flags using a Tiles procedural map
Download Sample Data
In order to follow this tutorial, you may want to use the supplied files. Please read the sample data instructions before downloading.
kf407_files.zip (385kb)
- Open kf407_01.max. This follows on from the previous tutorial
Sundial surface and meadow path
- Open the Material Editor and select the third sample window
- Change the Material Name to Gravel - noise
- Choose the Anisotropic shader
- Click the Map button to the right of the diffuse colour swatch to drop to the map level. This opens the Material/Map Browser so you can choose the type of map you need for the job
NOTE: The top type of map in the list is called Bitmap. This is what you would choose if you needed to include an image in the material (next tutorial). The others are all procedural maps
- Choose Noise and OK
- Noise Parameters rollout > Enter Size: 3
- Select Sundial surface and Assign Material to Selection
- Apply a UVW Map modifier to the surface and change the Length and Width to 1 after making sure Real-World Scale is checked Off
- The material should show in the viewport. If not, in the Material Editor press the Show Map in Viewport button
- In the Material Editor alter the Size parameter to gain the required result after test rendering

- Change Color # 1 to give a different color instead of black
TIP: You can apply an image instead of just a colour for noise by pressing the Map buttons next to the colour swatches
- Select Meadow path and repeat the assigning and mapping process as above
Fine tune the material and add bump effect
- Change the Size to 0.01
- Go to the Material level (top). Maps rollout.
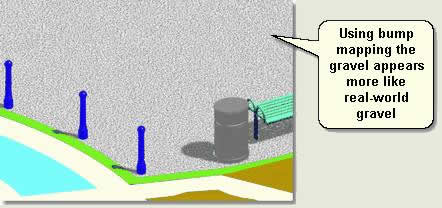
- Left click and drag the Noise Map in the Diffuse channel down to the Bump channel. Check Bump On and move the spinner to about 120. Notice when rendered the surface appears more like gravel
NOTE: Bump mapping makes lighter areas stand out and makes darker areas recede. This has the effect of making a bumpy surface as in real-world. This is often used for brick walls and flags to make the bricks and flags stand out from the mortar and not appear 'flat'
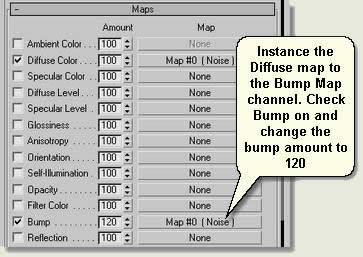
TIP: You can access the map level for any maps assigned to the material from these buttons. The map buttons next to the parameters on the Basic Parameters rollout are merely shortcuts to these buttons
NOTE: Changing the parameters in the Material Editor affects all the materials with that material assigned - so the gravel path and sundial surface are updated together
Flags and Maze mainfill
- Select the next empty sample window in the Material Editor and name the material Flags-red-tilesmap. Change the sample type to box (this is better for bricks and flags)
- Choose the Anisotropic shader
- Apply a Tiles procedural map by pressing on the map button and choosing Tiles
- In the Material Editor make sure Map Level > coordinates rollout make sure Use Real-World Scale is checked Off and the Size spinners areset to 1.0,1.0 (this will be different in VIZ)
- At the Tiles map level (this will have opened) Standard Controls rollout > Pattern Setup Choose Stack Bond from the list box
- Advanced Controls rollout > Tiles Setup Enter 4 in both Horiz. Count and Vert. Count. This means that when the UVW Map modifier is applied and length and width set to 1, the flag units will be set to 4 per metre, or 250mm per unit
- Make sure (as always) that Show Map in Viewport button is on
- Select Paving below steps in the viewport and Assign Material to Selection
- Apply a UVW Map modifier to the surface and change the Length and Width values to 1. The flags in the viewport should look like 250mmx250mm flags
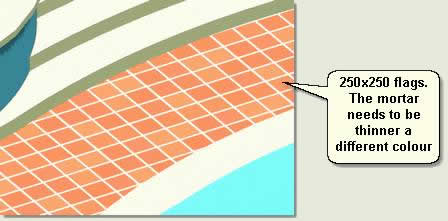
- Mortar Setup > Change the Horizontal and Vertical Gaps to 0.5
- Tiles Setup > Press the Map button to the right of the mortar colour swatch > ChooseBitmap > Select Aggregate 04 in the tutorials Map folder. This applies an image texture to the brick material

To alter the size of the aggregate image in the brick map you need to alter the tiling at the texture map level. This is further down the material hierarchy (remember where you are because you will need to go back up and down)
- Press the Map button to the right of the mortar colour swatch. This will now haveAggregate 04.JPG label on it. This will take you further down the material hierarchy to access this map's parameters
- Coordinates rollout > Change the U and V tiling both to 2. Press Show Map in Viewport button to display the tiling change in the viewport
TIP: At each level in the material when working with maps use the Show Map in Viewport button to display the particular map in the viewport if needed
- Press Go to Parent button to return to the Tiles Map level and then again to return to the Basic Parameters
- Maps rollout > Left click and drag the Tiles Map in the Diffuse channel down to the Bump channel. Check Bump On and move the spinner to about -80 (the minus sign reflects the fact that you need to make the lighter areas recede ie the mortar)
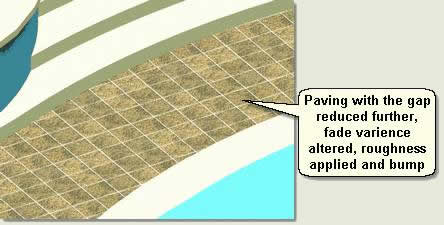
- Revisit the Tiles Map parameters and alter the texture coordinates (next level down) to 3and the mortar gap (Tiles Map level) to 0.3. Also experiment with the colour and fade varience on the Tiless Setup parameters and perhaps change the Roughness to 5%. Notice when rendered the surface appears more like paving
Steps
To make a material for the steps you will use the same material as the flags (copied), resize the flag units to 900mm and use the UVW Map modifier to position the flags correctly
- Ungroup Top Steps. Select TOPSTEP1.01
- In the Material Editor copy the Flags-red-tilesmap material to the next sample window by left clicking and dragging to the next available window. Then rename the material Step blocks tilesmap
- Select TOPSTEP 1 and Assign Material to Selection
- In the Bricks Map parameters change the Vertical Count to 0.1 and the Horizontal Count to 1. This will mean that no gaps show across the steps as would be the case in construction
- Apply a UVW Map modifier and change the Mapping to Box and the Length, Width andHeight to 1
- Use the UVW Map Gizmo to move the material left or right in the viewport
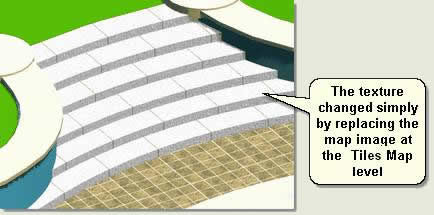
- Repeat this procedure with all steps (including the bottom steps) to produce step blocks that are randomised left to right as below

- Re-visit the two materials for paving flags and step blocks and change the textures by going to the Tile Map level and pressing the Map button to the right of the Tile Texture colour swatch. Under Bitmap Parameters rollout press the Map button at this level and navigate to and choose another texture map
Maze mainfill surface
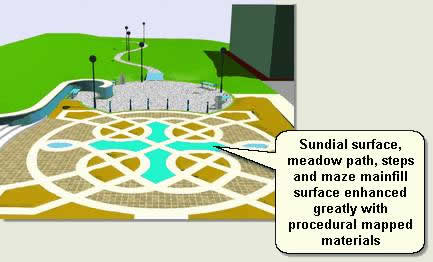
- Finally, apply the Flags-red-tilesmap material to Maze mainfill using the mapping procedure outlined above

No comments:
Post a Comment