by Didik Wijaya
 In this tutorial I will show you how to create facial expression in 3ds max. This means you can add emotions to your character. For example, angry, sad, happy, etc. Actually there are 3 ways to create facial expression. First is by totally using Bones. You can place bones to move all parts of character's face. The second is using Morpher. Here you morph face from one condition to another. In my opinion, using Morpher is the quickest and simplest ways to create facial expression in 3ds max. However, in this tutorial, I will use the third solution, combination of both Morpher and Bones to create facial expression. Morpher for the main expression, and Bones is used to add minor movement, like ear flapping. Note: If you don't familiar with Morpher, read this tutorial first: Morphing Human Head Into Werewolf
1. In this tutorial, I am going to use Cartoon Bear 3D model from Modeling Cute Cartoon Bear Tutorial. I added several bones, also teeth. For facial expression, I will use bones to move ears, jaw, and head. You can download required file here. The model is already rigged and skinned. Open file cartoonbear_facial_start.max.
2. Select head object, hold Shift and move to create its clone. Use Copy as cloning method. You will find the cloned object is ruined, go to Modify tab and delete Skin modifier to solve this problem.
3. Change clone object's name. You need to do this because later this will help you when using Morpher. For example I rename the object as "head mouth smile". Next activate Vertex selection, and try to modify vertices position to change mouth shape. When you do this, please remind that: You must not delete or add any vertex. All you have to do is modify vertices positon. You can also use other selection tool, polygon or else, but still no adding or deleting.
4. Image below shows example of modified mouth.

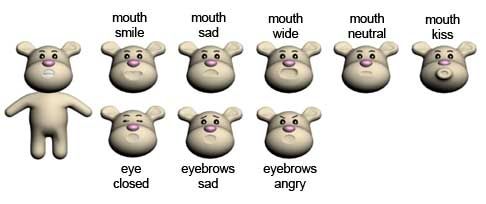
5. Repeat above procedure (cloning and modifying vertices) until you have several different head. Basically, when you use Morpher to create facial expression, you need to have original head model, and other cloned head models with different expressions. Rename each cloned head with different and unique name. For facial expression, usually you need to create:
- Different mouth shape (closed/enutral, smile, sad, etc)
- Different eye shape (closed)
- Different eyebrows shape (sad, anger, thinking, etc)
When finished, delete all Turbosmooth modifier from each cloned head. If you don't do this, you can't use Morpher modifier later.
If you don't want to create these models by yourself, you can open 3ds max file from downloaded file (cartoonbear_facial_part1.max)
5. Select original head object. Apply Morpher modifier. Position Morpher under Skin modifier. This will ensure, head is not deformed too much when you rotate bones later.
In Channel List, click Load Multiple Targets button, and use all cloned heads. You will see each cloned head's name in each different channel. Now, you can understand, why you need to rename each cloned head with different and unique name.
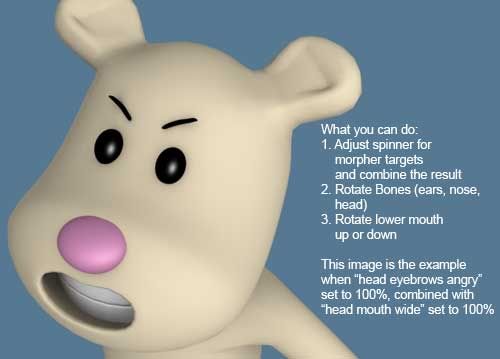
Try to adjust spinner in each channel. Each channel has value from 0-100. When you increase value, original head object will change. You can also combine channels to get different facial expression
You can hide all clone heads after applying Morpher. But you can't delete them because they are needed for morphing information. Sample file: cartoonbear_facial_part2.max
5. To create facial expression animation. Activate Auto Key. Move to desired frame and adjust spinner value. You can create any facial expression you want. The limitation is your imagination.
5. Video below shows sample of finished facial animation expression. You can see the cartoon bear gets sad, angry, and even wants to kiss you. Sample animation is available in file cartoon bear_facial_part3.max in downloaded file.


THank you
ReplyDelete