| Part 1 | | | |
by Didik Wijaya
 In this tutorial you will learn to create a futuristic Tron Legacy light bike using 3ds Max. This bike showed up in the latest box office movie Tron: Legacy (2010). This science fiction film is produced by Walt Disney Pictures. It is a sequel to the 1982 film Tron.You will create low poly version of this bike model using 3ds max. Let's begin!
1. First, we need a blueprint. You can download required file here. This file contains blueprint, and sample of finished light bike. The images used for blueprint originally created by Paul-Moad-Dib
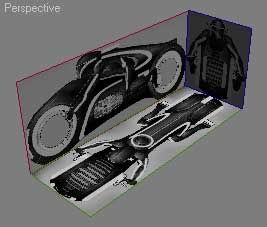
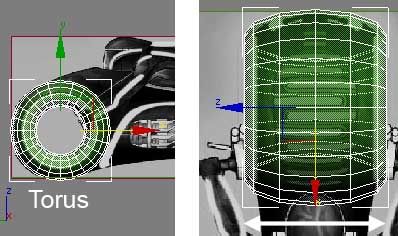
2. Open "tronlegacy_lightbike_start.max". Create torus in Left viewport. In Top viewport, stretch along horizontal axis.
Clone or copy modified torus for rear tire.
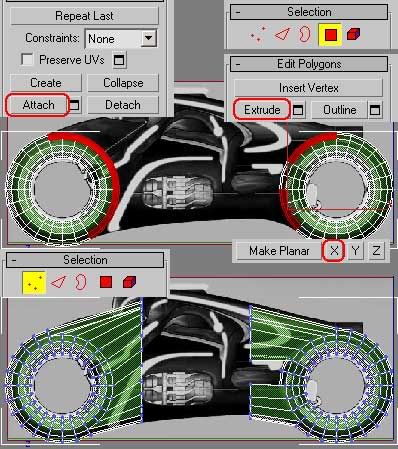
3. Select one torus. Right click and choose Convert to>Convert to Editable Poly. Go to Modify tab. Click Attach button, then click other torus to combine into single object.
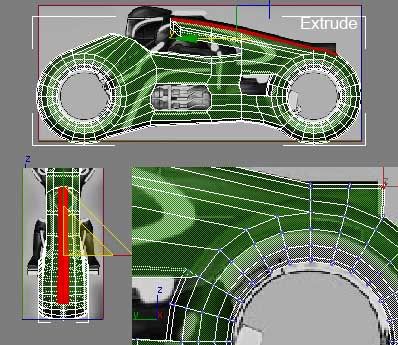
Activate Polygon selection. Select polygons in Left viewport like image below. In Edit Polygons rollout, click Extrude button.
Don't deselect anything yet. Click Make Planar X.
Change to Vertex selection. Adjust vertices position like image below..
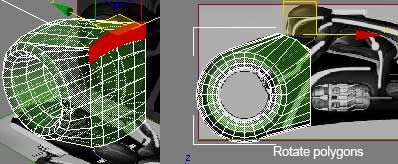
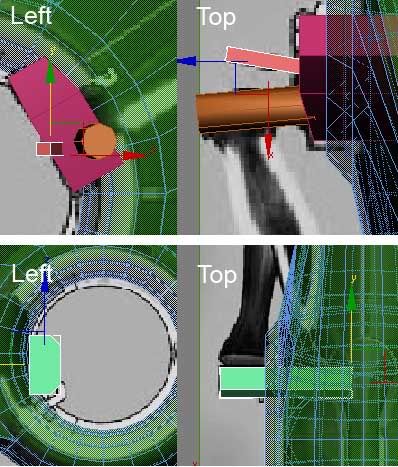
4. Change to Polygon selection. Select several polygons on top of front tire. In Left viewport, rotate selected polygons like image below.
5. Select polygons at rear tire like image below. Extrude like image below. Top polygons area need twice extrusion.
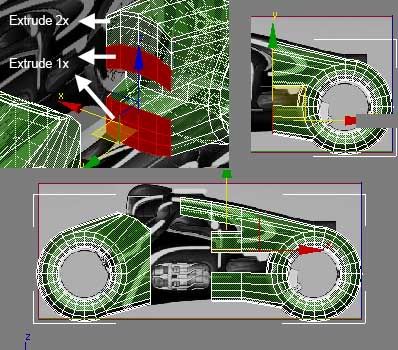
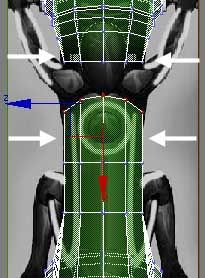
6. In Top viewport, make slim bike body, by moving or stretching vertices.
by Didik Wijaya
In Part 1 tutorial, you have started to model Tron Legacy light bike. Let's continue with the process. We will create the middle part of light bike body.
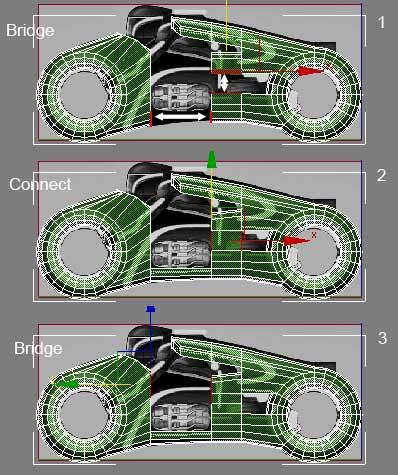
1. (1) Select polygons like image below, and use Bridge to connect them.
(2) Select vertical edges. Use Connect button to split the edges.
(3) Use Bridge to connect selected polygons.
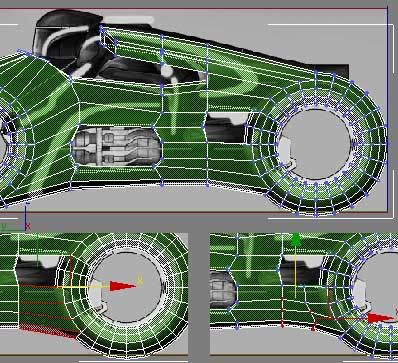
2. Change to Vertices selection. Modify vertices position like image below.
Select edges near rear tire. Use Connect to split edges and modify vertices position.
3. Select polygons on top of bike like image below. Use Extrude to add slight extrusion.
In Top viewport, stretch selected polygons like image below.
And, in Left viewport, modify vertices position above rear tire.
4. Your basic light bike body is finished. We will continue in the next tutorial to add more details.
by Didik Wijaya
In Part 1 and Part 2 tutorial, you have finished creating light bike basic body. In this tutorial we will continue to add more details.
1. Enable Polygon selection. Open Grid and Snap Settings (Customize>Grid And Snap Settings). Check Endpoint and Midpoint, and make sure all other options uncheck. This will enable you to move exactly at the end or middle of edge. Click Cut button. At the bottom of tire cut like image below. Repeat the process with other tire. Make sure you cut at right and left side of tires.
When finished, turn off Cut and 3D Snap Toggle. Select all polygons under the sliced area. Delete those polygons.
Change to Vertex selection. Select all vertices at the sliced edges. Click Make Planar Z to make them at the same height level. Neat!
2. Cut polygons in front tire like image below. Select polygons, and delete them.
3. (1) Select polygons at the top of bike (above front tire) like image below. (2) Use Extrude with negative value. (3) Then, rotate and move selected polygons. (4) Then delete 2 polygons like image below.
4. Activate Polygon selection. Click Create button. Activate 3D Snap Toggle. Click three times to add polygon. Repeat the same process with the other side. When finished, turn off 3D Snap Toggle.
5. (1) In rear tire, select polygons like image below. (2). Use Inset. (3) Activate Constraints=Edge. Stretch selected polygons at horizontal axis. When finished turn off Constraints, make it None again.
6. Activate Polygon selection. Use Cut and 3D Snap Toggle to cut like image below.Make sure you cut both left and right side of body
Then, activate Vertex selection, with Constraints=Edge. Move vertices to make smoother curve, without destroying the mesh.
8. Turn off all sub-object selection. Apply Shell modifier. Use Inner Amount=2, and Outer Amount=0.
9. Add several detail using box and cylinder.
7. Create tires using torus. Also add two cylinders (left and right) as engines. Also add 2 segment cylinders on top of bike. When finished, select body, click Attach button, click all other objects except two torus (tires). Your own Tron Legacy light bike 3D model is finished. Now, it's time to add materials.
by Didik Wijaya
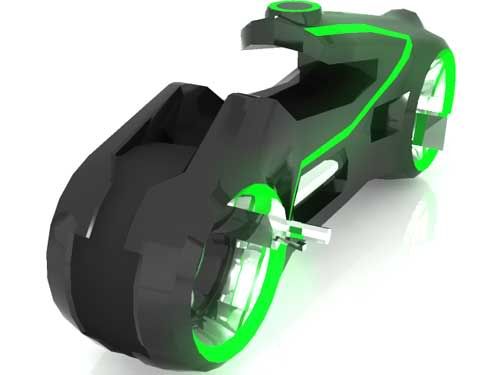
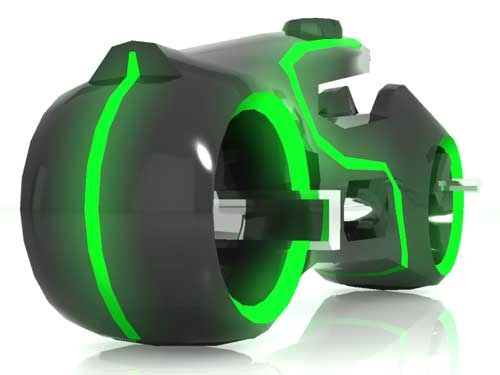
This is the latest part of creating Tron Legacy Light Bike using 3ds Max. This time you will add simple material to the bike.
1. Select body. Activate polygon selection. Select several polygons and in Polygon Properties rollout set their IDs. Each ID represent different color or material. Repeat the process until all polygons have its own ID. In this tutorial, we only need 3 IDs.
2. Open Material Editor. Create simple black color material and apply to tires.
Select one of unused material slot. Apply this material to body. Click Standard button and choose Multi-Sub Object Material. Click Set Number=3.
Modify each sub material. Here, I just modify Diffuse color. Each sub-material is applied to specific polygon ID.
2. Congratulations. Your Tron Legacy light bike 3D model is finished.


The blueprints are not linked properly, nor on the website. Thought I'd let you know.
ReplyDeleteNone of the links work
ReplyDeleteiam sorry about the links , because its deleted from the original site .
ReplyDeleteHi,
ReplyDeleteI've made them with the original files.
I'll try to post them later this week.
Grtz
i am making this bike with my collage mates can i get the name of this software through which these blueprints are made if available than please email me regarding this on my email address - indiafest.in@gmail.com
ReplyDelete