In this tutorial we will create a simple scene using the traditional methods of modeling in 3dsMax .... the results will be rendered with V-ray plugin ...
**Done With 3dsMax 2011,Vray 1.50.0 sp5...
Author:
**Done With 3dsMax 2011,Vray 1.50.0 sp5...
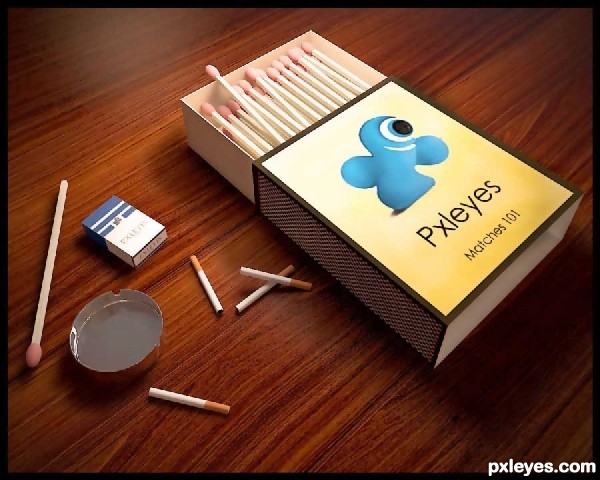
End result:
Author:
Views: 31747
Score: 7.95 / 10
Author earned: $10
Step 1
First of all ... we should prepare our 3d objects ... so our first steps will be about how to create them .....In this scene we have (5) separate objects:
* the match
* the match box
* the cigarette
* the ashtray
* the cigarette pack
we will learn how to create them in 3dsMax ........

Step 2
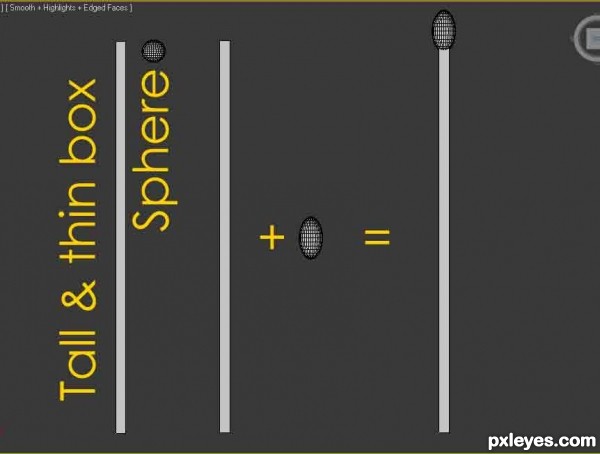
1- The match .....For the match creation we will use 2 objects ( box + sphere )
*The box will be tall & thin and this will be the wood part of the match
**The sphere will be scaled on th Z axis so we will get an egg shape .... and this will be The red Sulfur part of the match ....
By putting the sphere on the top of the box we will be finished from the first of our 5 objects.
Step 3
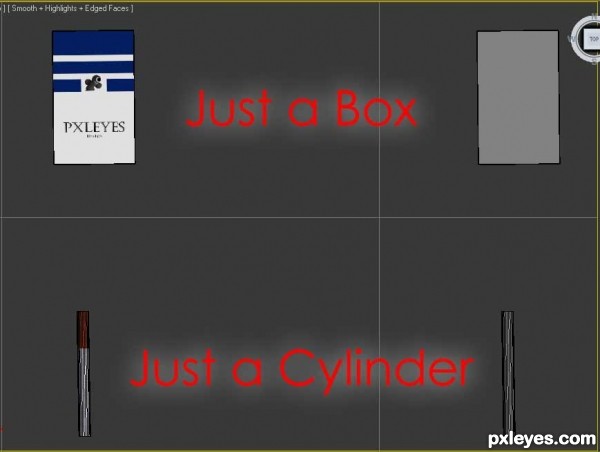
2- The packThe pack is just A BOX and we will not modify this box by any way ...
3- The Cigarette
The Cigarette is just A Cylinder and we will not modify this Cylinder by any way ...
Step 4
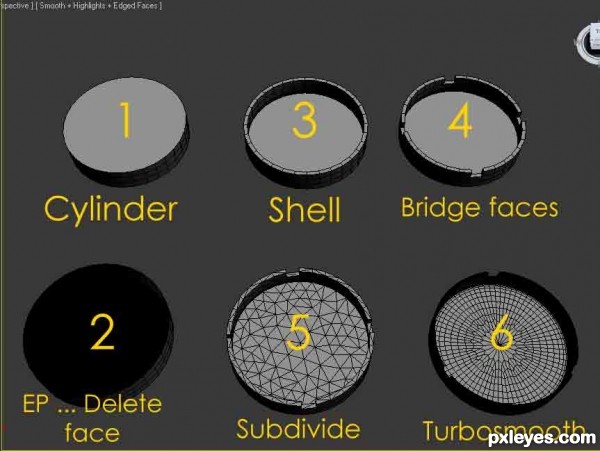
4- The ashtrayto create the ashtray we have to do 6 steps :
1- Create a cylinder with (2) height segments
2- Turn it to editable poly .... then delete the upper face from the cylinder.
3- Apply Shell modifier on the new shape.
4- Turn it again to editable poly ... and work on the cigarette places by Bridging some faces together
5- Apply Subdivide modifier on the new shape
6- Apply Turbosmooth modifier on the new shape with 3 steps
And this is our new metal ashtray .......
Step 5
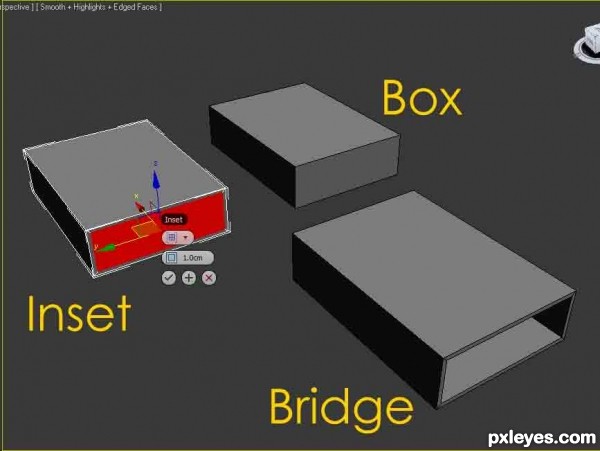
5- The match boxthe match box is created from 2 parts :
1- the first part is created from a box (with no segments) ,
this box is turned into edit poly ......
then we select the two small faces.......
inset them a little ....
bridge them now...
Step 6
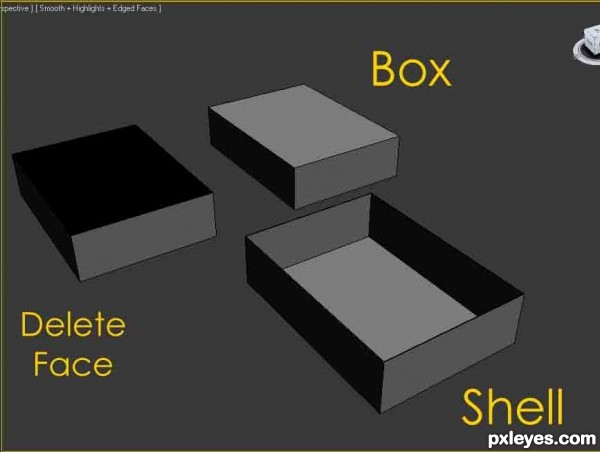
2- The second part is also created from a box (with no segments) ......This box is turned to poly .....
The upper big face is deleted....
Shell modifier is apllied .....
By merging the last tow shapes that we created ... we will get the match box ....
Step 7
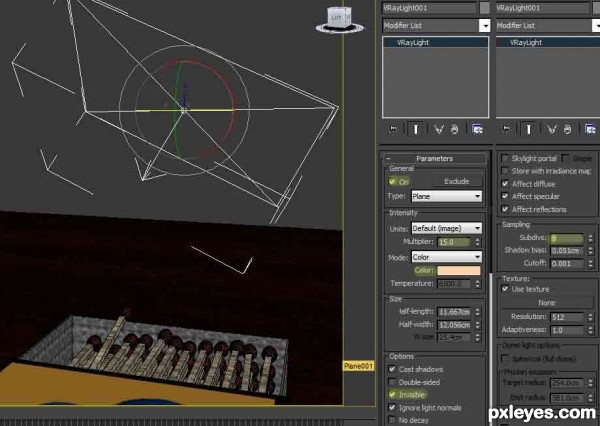
Now the next step after modelling the objects is to add a light source to the sceneIn our secene we will use the most popular light in the vray, and its called Vray Light ....
now from the lights menu >>>> Vray >>> vray light
draw the light from the top veiw the adjust its direction so it casts the shadows to the diretion you want ...
the vray light settings are show in the picture below: >>>>
Step 8
Now Some render settings ..... vray 1.50 SP5 .....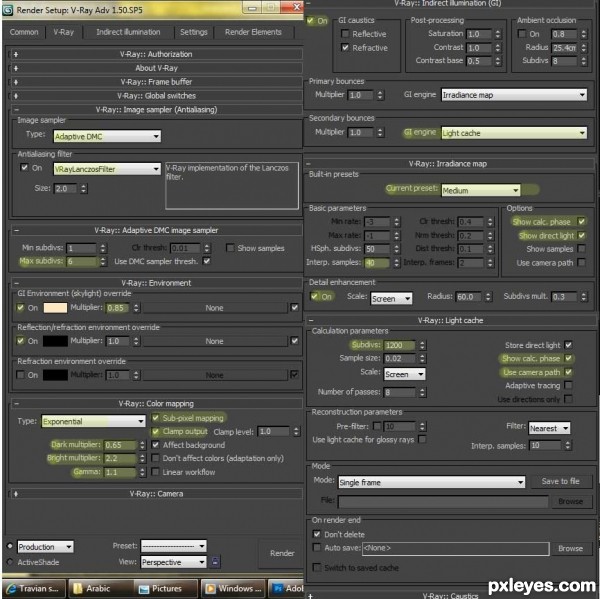
Step 9
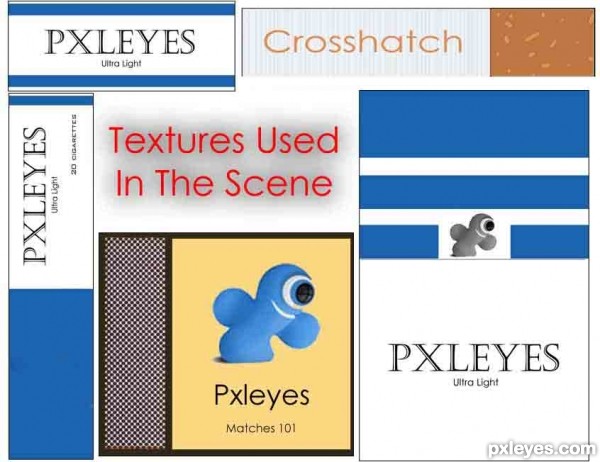
Textures used for objects ......Wood materials are all from Archshaders Vol1 which you can purchase from evermotion, or u can use any other wood material u like .....
for high resolution textures mail me ;)
Step 10
Final Result .,....

No comments:
Post a Comment