In this tutorial I will explain how to model a palm tree from start to finish. I use 3DS Max and Photo shop as the software. However the steps in this tutorial can be followed by most 3D applications.
Author:
End result:


Author:
Views: 30206
Score: 7.5 / 10
Author earned: $30
Step 1
To start, go to your shapes tab and select spline, next create a spline in the front viewport as seen in the image.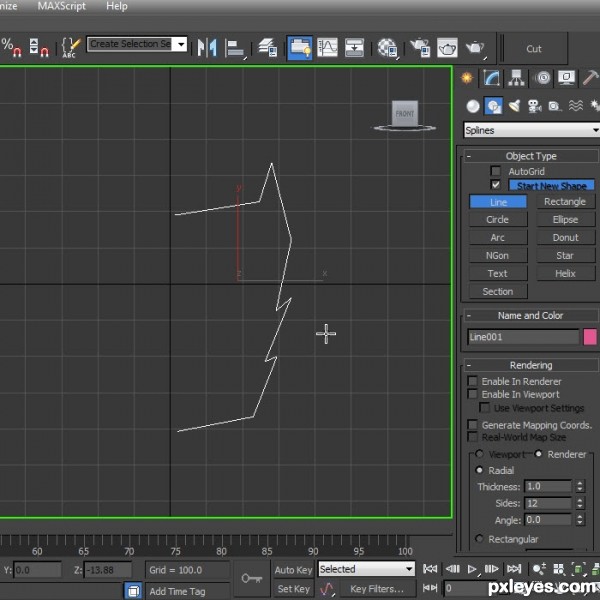
Step 2
Next go to your modifier tab and apply a Lathe modifier to your spline selection.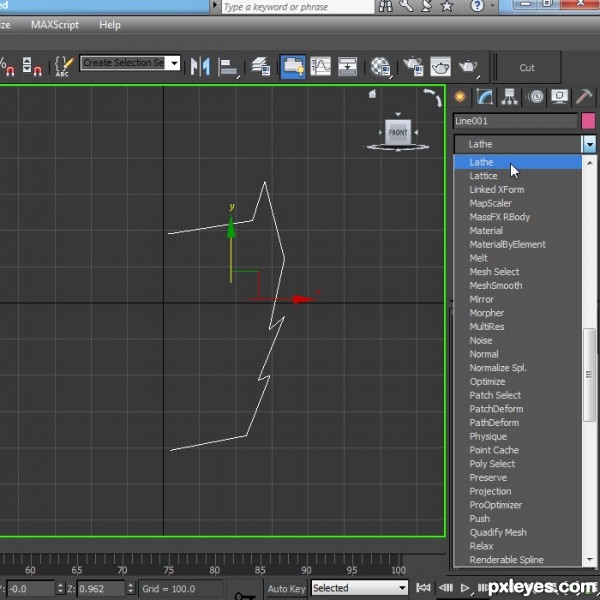
Step 3
Next chose Min as the alignment and check mark Weld Core.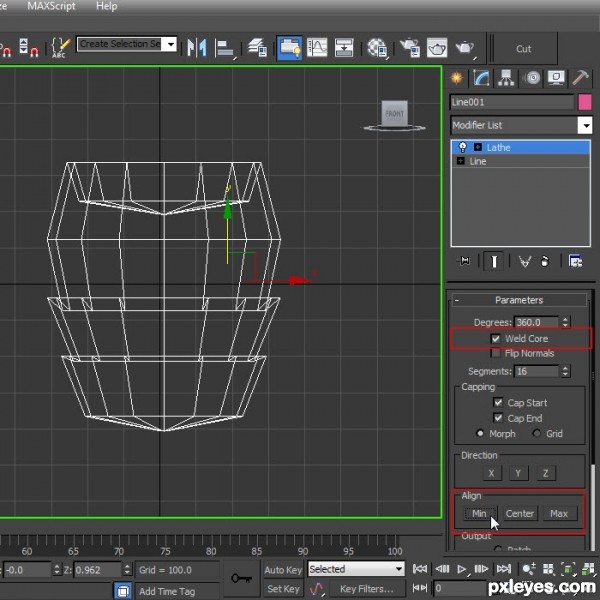
Step 4
Next apply an edit poly modifier so we can edit our palm tree base.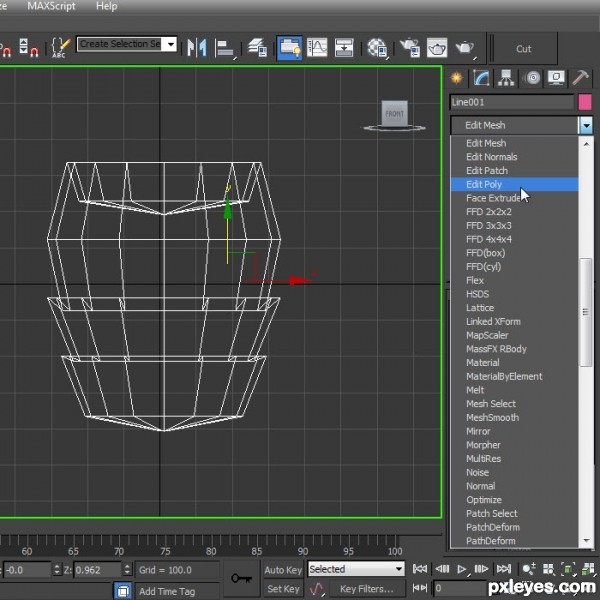
Step 5
We should have something like this after edit poly is applied.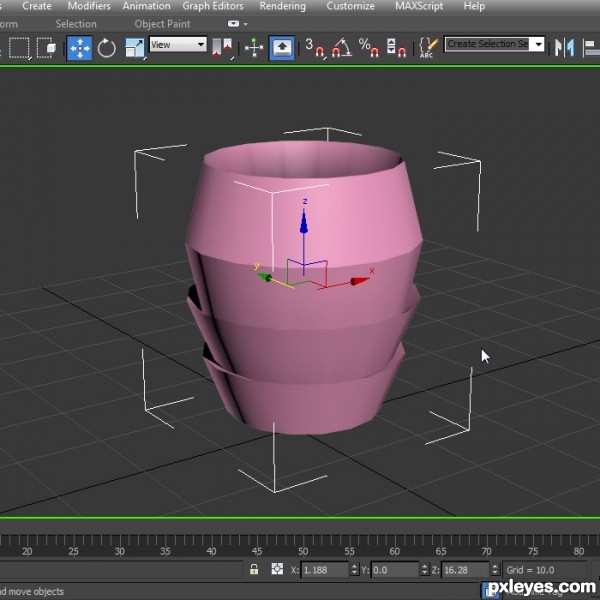
Step 6
Next Save your file in your modeling directory.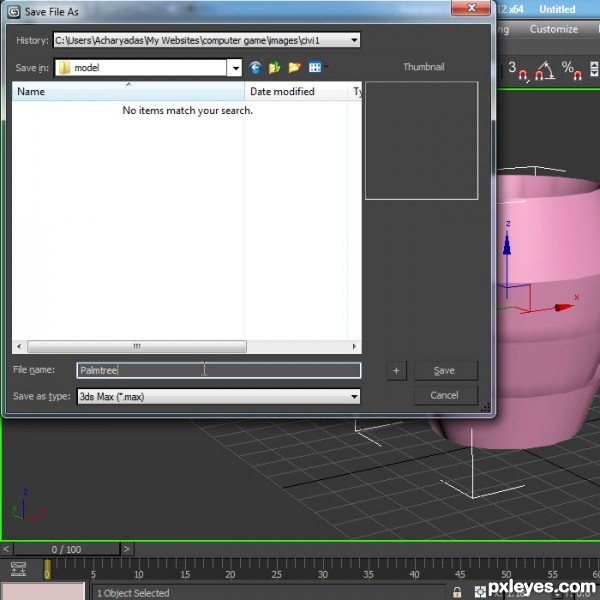
Step 7
Next we will want to apply an Unwrap UVW modifier to our model. Do this in your modifier tab.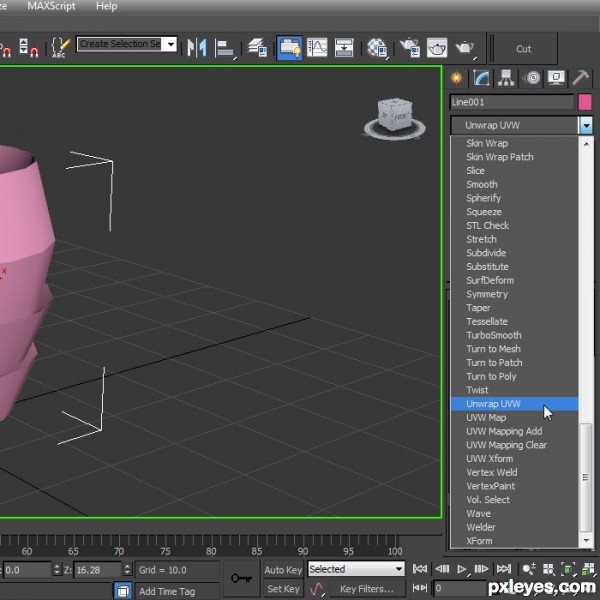
Step 8
This is what your Unwrap UVW modifier screen should look like, after you click on Open UV Editor.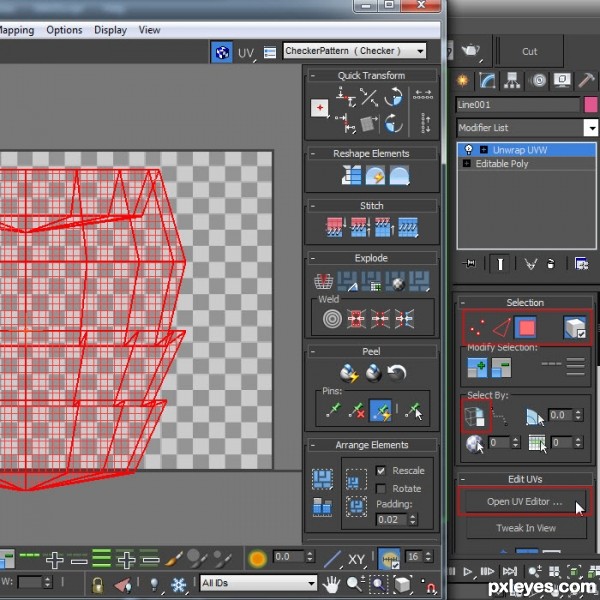
Step 9
Next click on Mapping, then Normal Mapping.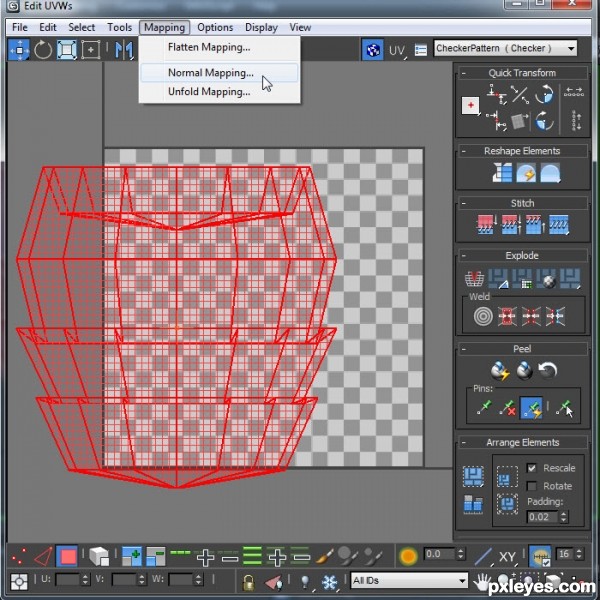
Step 10
Next chose Box Mapping. You can play around with the settings if you like, however I think that Box mapping is the best for something like this.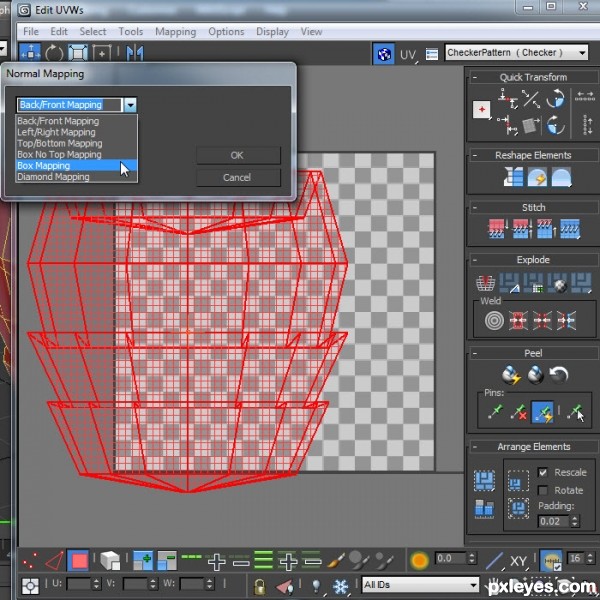
Step 11
Next you should get something like this, however I scaled mine down to leave room for other things. Scale yours down by selecting your scale button and when scaling hold down Ctrl and Alt to get an even scale.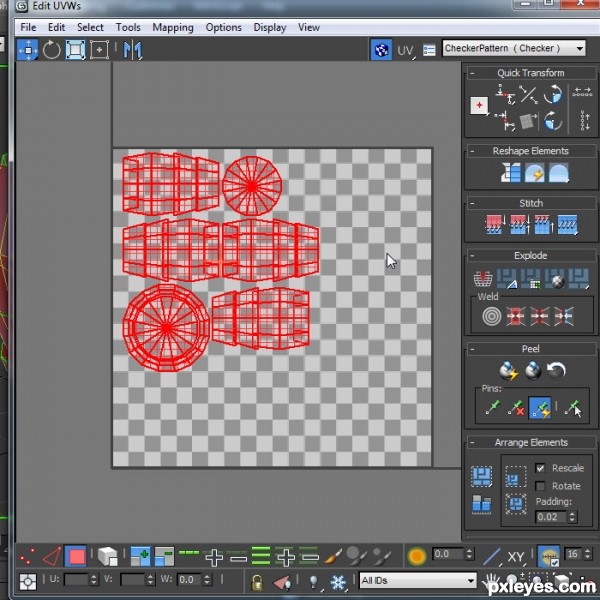
Step 12
Next Right Click on your modifier stack and chose Collapse To.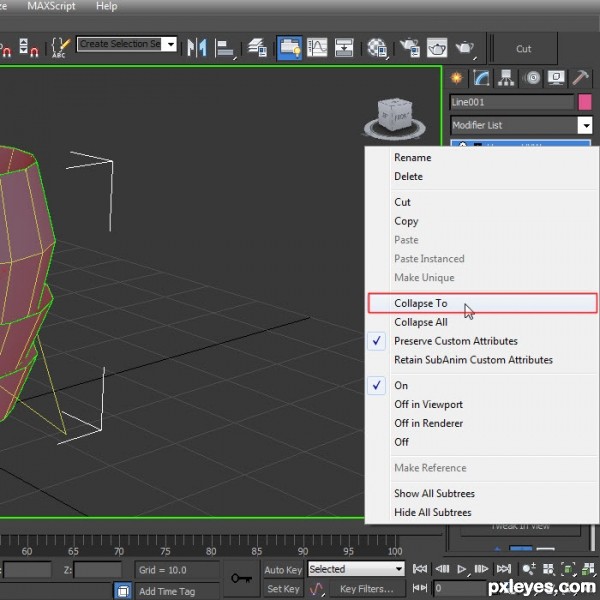
Step 13
Next make a copy of your palm trunk by holding down Shift and dragging up, make 18 copies. I have mine on Instance, however if you are not going to make any more changes to your model at this time you can just chose copy.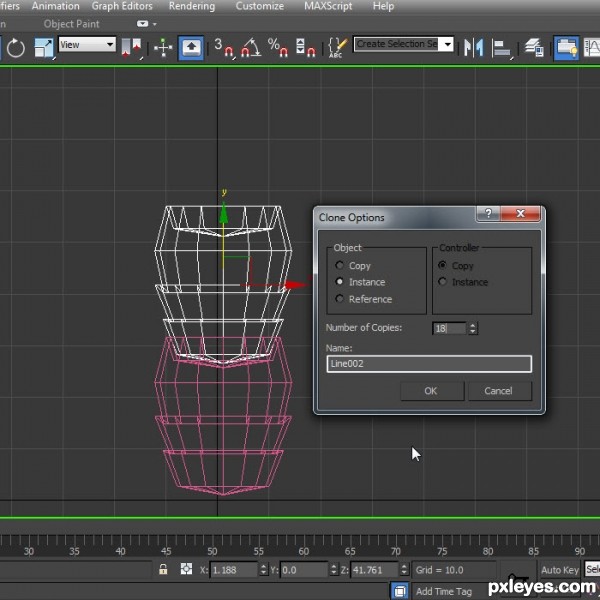
Step 14
If you did chose Instance, then to make all your copies regular, select them all and click this button to make them all unique.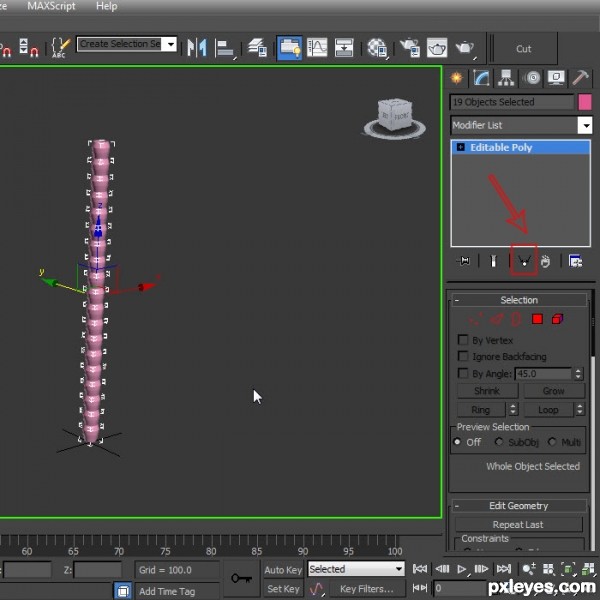
Step 15
Next attach all your palm trunk pieces so you have one full piece.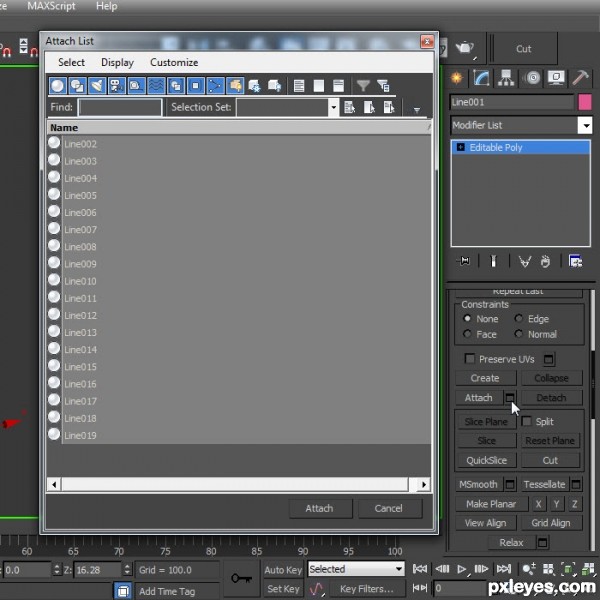
Step 16
Next in top viewport create a plane for your palm leaves.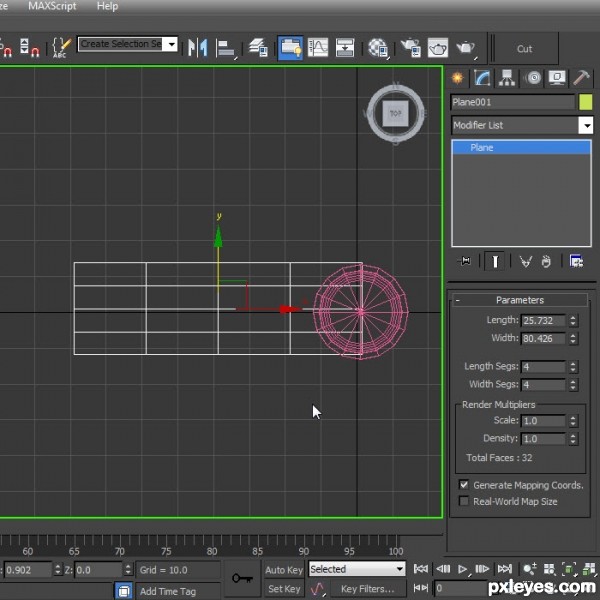
Step 17
Next activate vertex mode on your palm trunk and move the center vertexes up so it creates a point.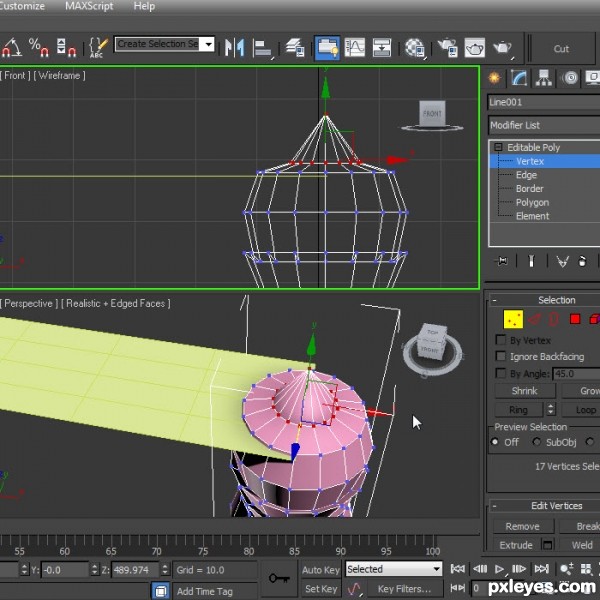
Step 18
Next select your palm trunk and then attach the palm leaf to it.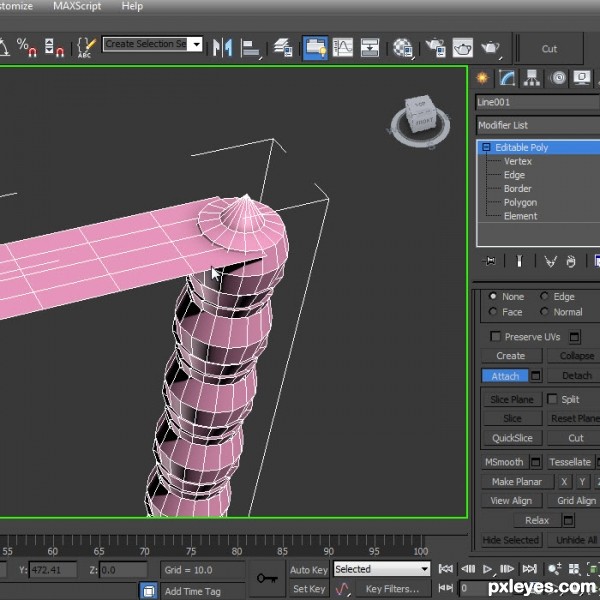
Step 19
Once again apply a Unwrap UVW modifier to your model.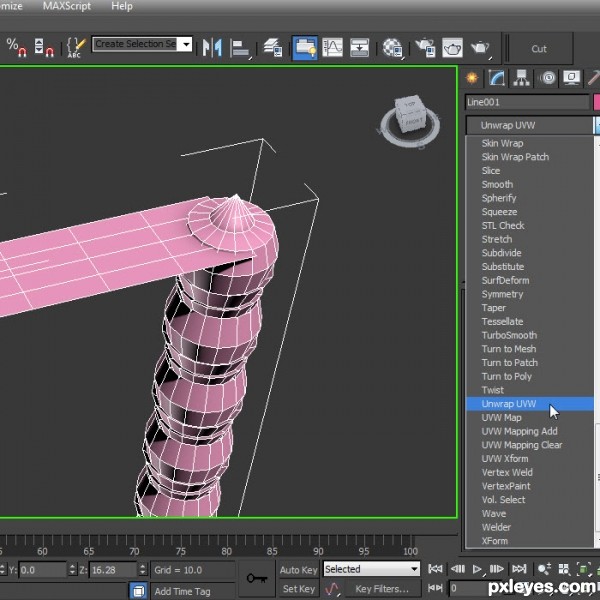
Step 20
Scroll down to the bottom of your Unwrap UVW modifier and click on planar mapping. Find the correct X Y X to use. I used Z for mine. This will flatten out your palm leaf.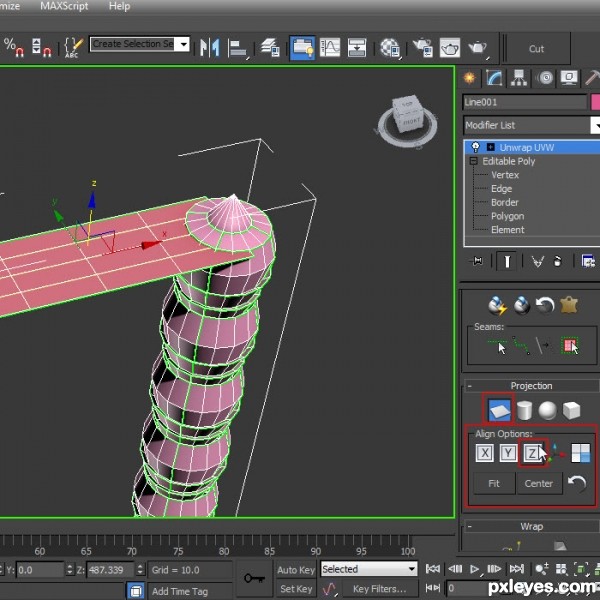
Step 21
Next scale down your palm leaf until you have something like this.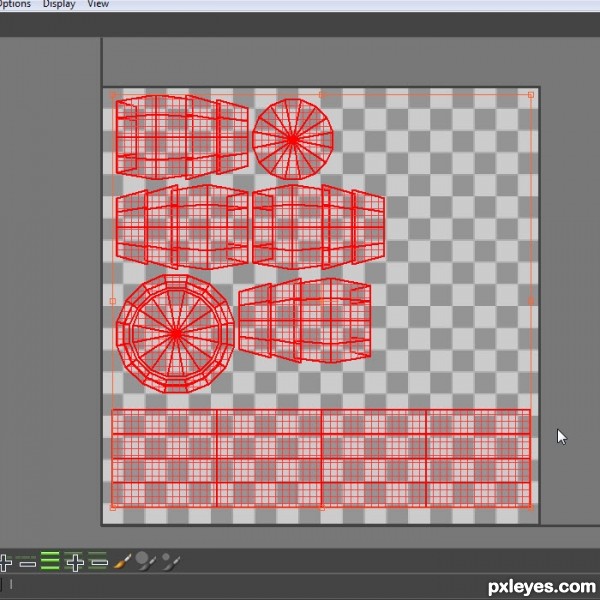
Step 22
Next click on Tools then Render UVW Template to generate a template to use.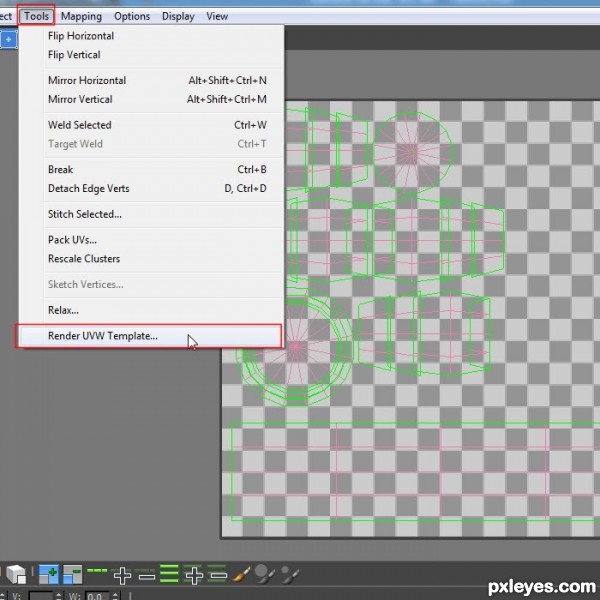
Step 23
Next give your template a size, I like using very large sizes because I can always scale down and keep the quality. I chose 4096 X 4096 for my template.When you are ready to generate a template click on the button, Render UV Template, then Save your new template in your texture directory.
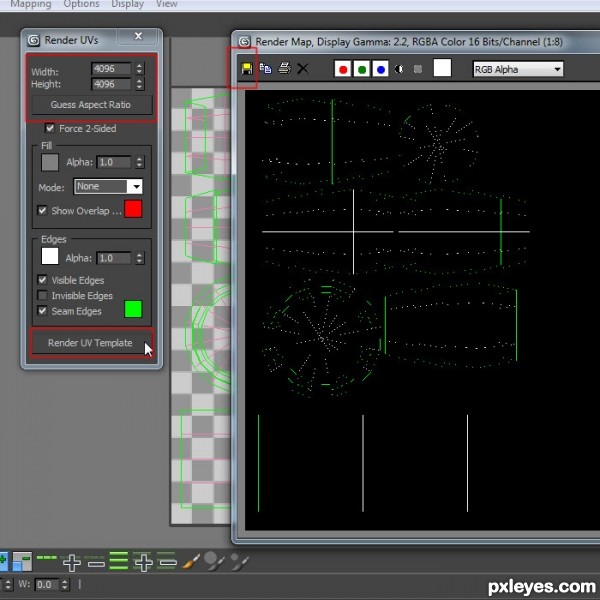
Step 24
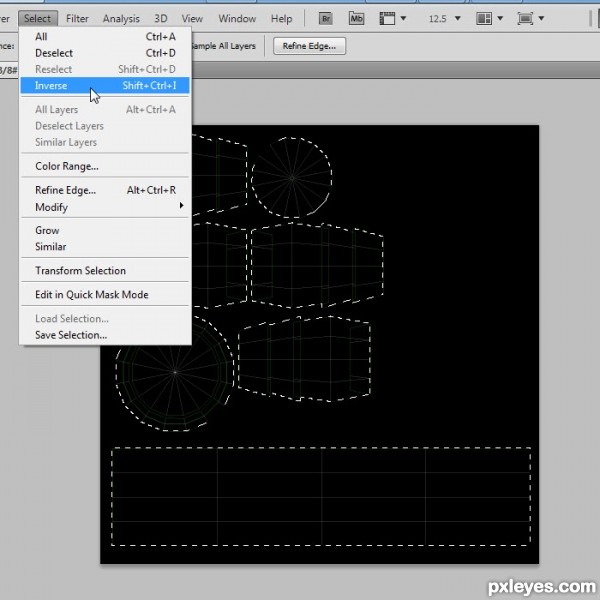
Next open up Photo shop and bring your new template in. Next select everything that is black by using your magic wand tool.Next click on Selection and then Inverse, so you invert your selection.
Step 25
Next Copy and Paste your new selection as a new layer. Then Right click on your new cutout layer and chose Blending Options.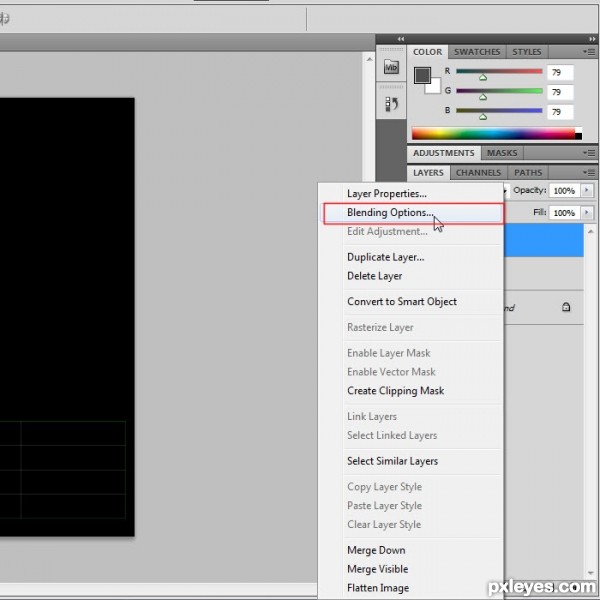
Step 26
Give your new cutout layer a stroke setting of 8.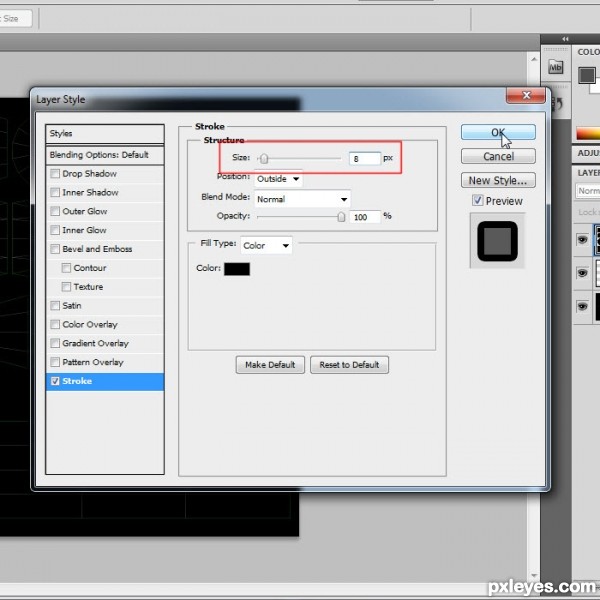
Step 27
Next create a new layer under your cutout layer and then Right click on your cutout layer and chose Merge Down.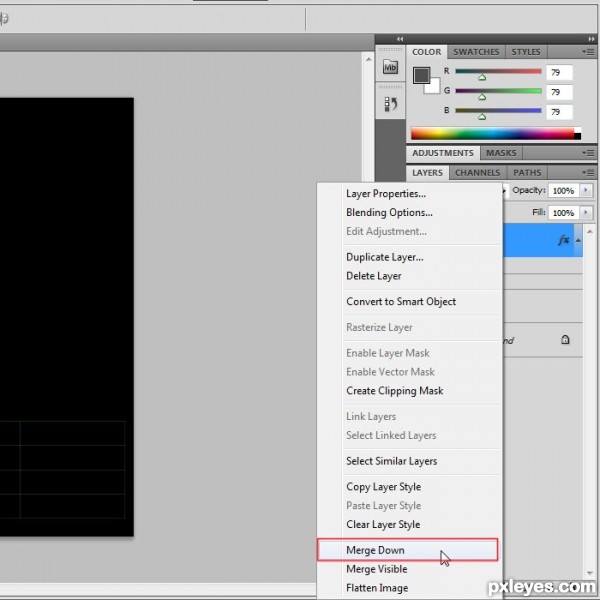
Step 28
Your cutout layer should look something like this now, however the background needs to be black, so make your background black.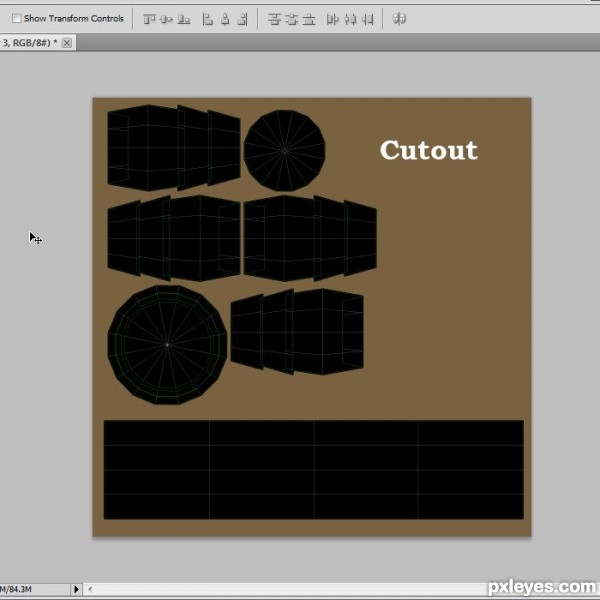
Step 29
Next Save your texture in your texture directory. I like to use TIFF formats because they can hold layers and save very quickly.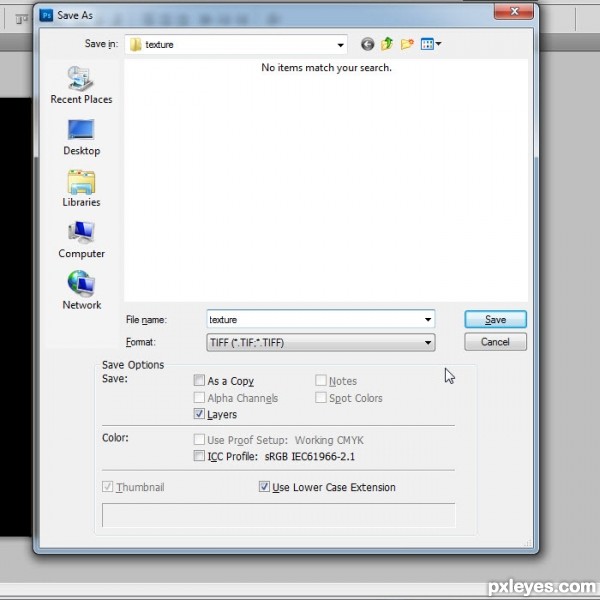
Step 30
Next start developing your texture by going to free texture resource websites and downloading some palm bark textures and also some palm leaf textures. Both these websites have palm bark and palm leaf textures to use for free.www.my3dtextures.com
or
www.cgtextures.com
Next open your textures in Photo shop and start to create something like this. Follow your cutout layer as your blueprint on how to place your textures. When you are finished you should have something like this.
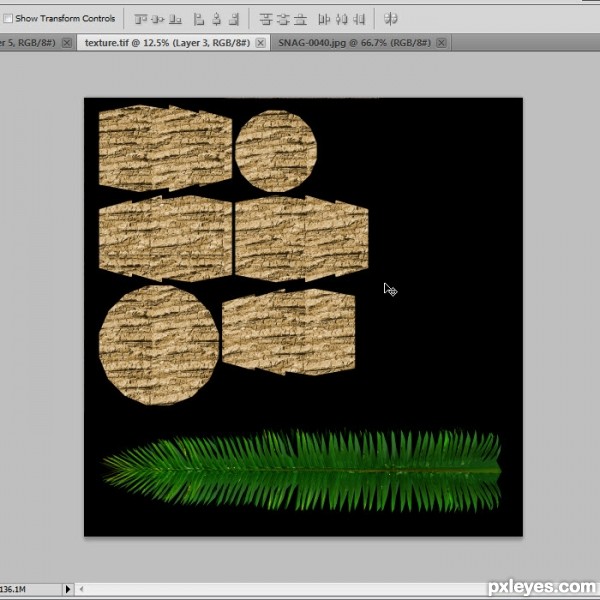
Step 31
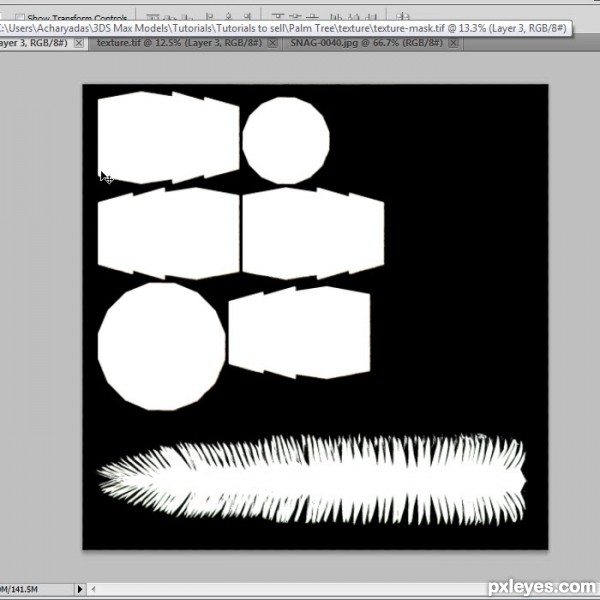
Next we need to make a Mask texture, to do this hold down Ctrl and at the same time Left Click on your cutout layer. This should create a selection of your cutout layer. Next create a new layer and fill it with white color.Save this new texture as Mask in your texture directory.
Step 32
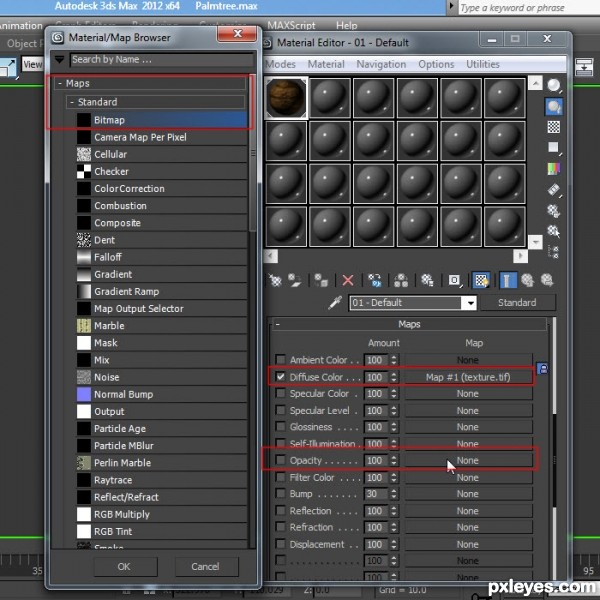
Next go into 3DS Max and open your materiel editor. Then pick a blank texture slot and open your new texture into your diffuse slot. Your new Mask texture goes in your Opacity slot.Click on each blank mapping channel and then pick Bitmap from the list and load each texture into their respective channels.
Step 33
After clicking apply materiel to selection in your materiel editor, we should now have something like this.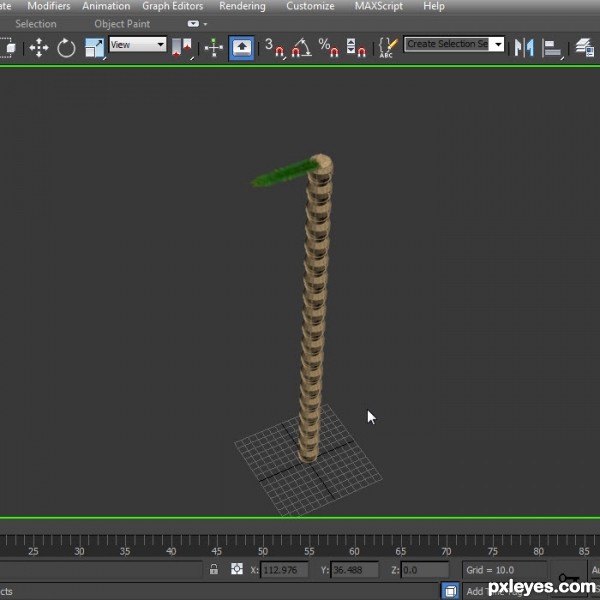
Step 34
Next detach your palm leaf from the main object.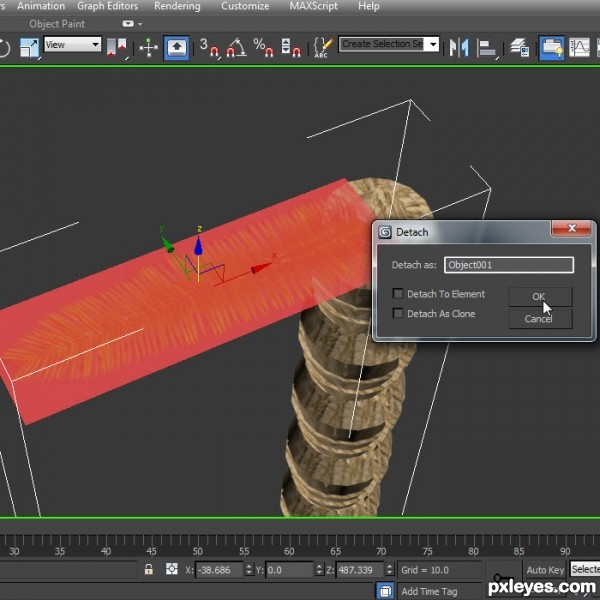
Step 35
Next click on your Hierarchy tab and then click on Affect Pivot Only. Next move your X Y Z coordinates to the end of your palm leaf where it attaches to the palm trunk.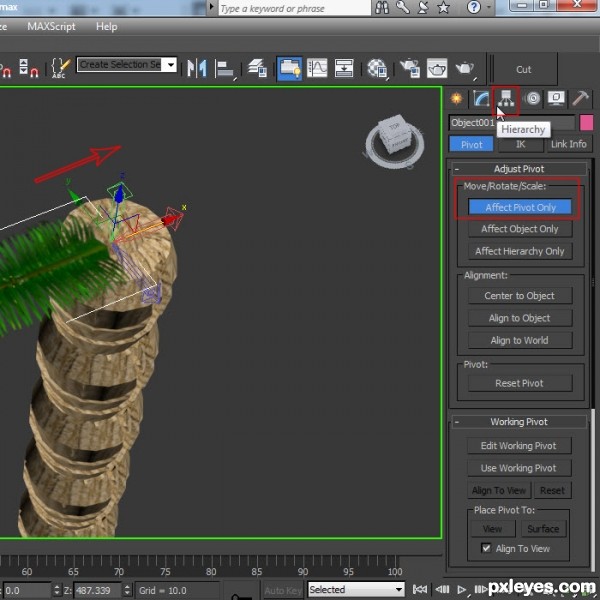
Step 36
Next apply a Bend modifier from your modifier list and bend your palm leaf like this.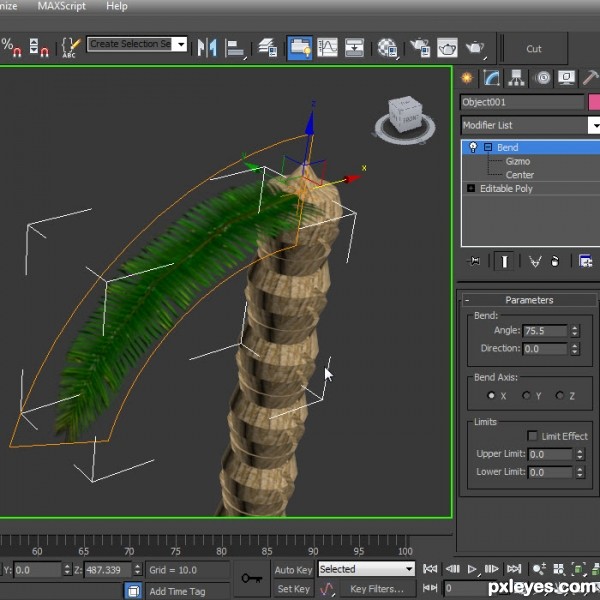
Step 37
Next copy Rotate your bent leaf around your palm trunk top like this.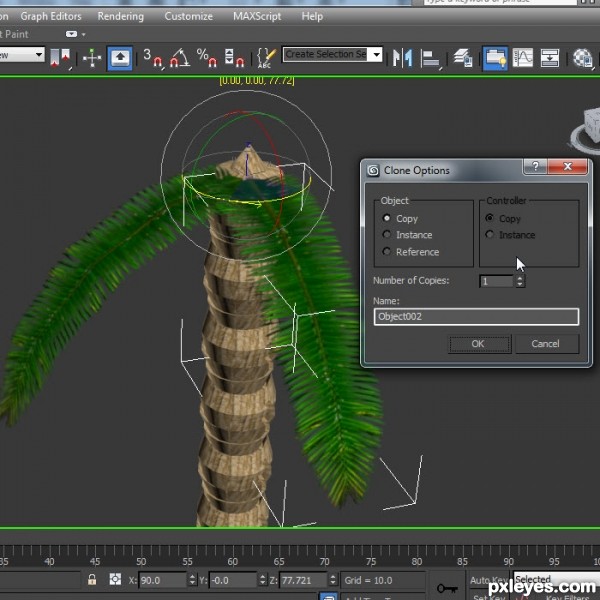
Step 38
Keep doing this to build up your palm tree top.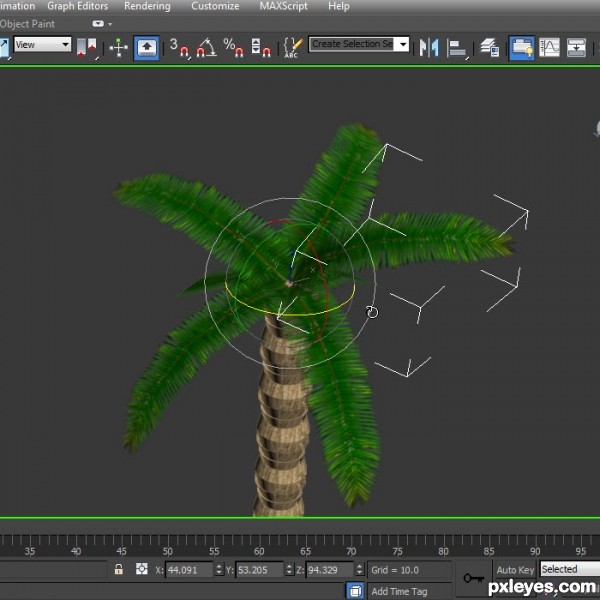
Step 39
You can also scale some of your palm leaves so they are not all the same size. Try to make the palm leaves smaller on top and larger on the bottom.When you are finished you should have something like this.
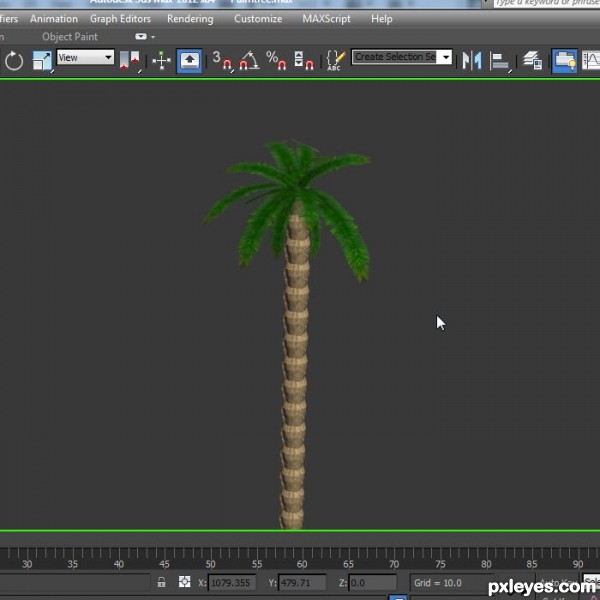
Step 40
Next attach everything, so you have one object.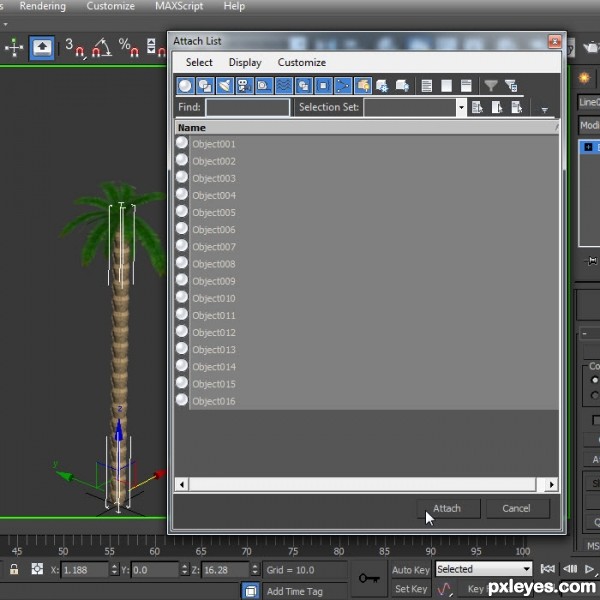
Step 41
Next select only the top palm leaves and while holding down Shift drag them down creating a copy. Use your scale command and rotate command to create smaller leaves at the base of your palm tree so you have something like ferns.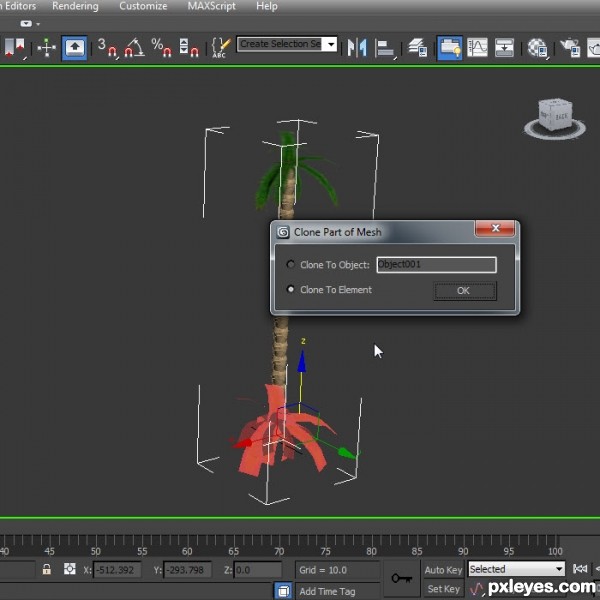
Step 42
Next apply another Bend modifier to your model and bend it any way you like for your scene.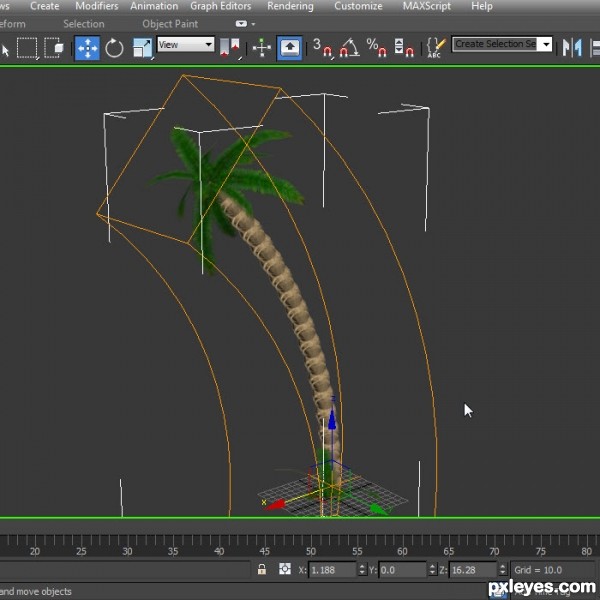
Step 43
This is a final render of the palm tree.

No comments:
Post a Comment