In this tutorial, you will learn to create metallic Transformers Logo using Photoshop. I decided writing this tutorial after I watched Transforrmers 2: Revenge Of The Fallen. You will know that the process of making metallic Transformers logo is not too hard. I believe you will learn a lot from this tutorial.
1. First download several files below::
- Vector file for Autobot Logo (EPS, RAR) or Vector file for Decepticon Logo (EPS, RAR). You can choose to create Autobot logo or Decepticon logo. Note: This tutorial only shows you how to create Decepticon Logo.
- Metal texture image (JPG). This is not the best texture for creating Transformers Logo, but this is the best I can found so far.
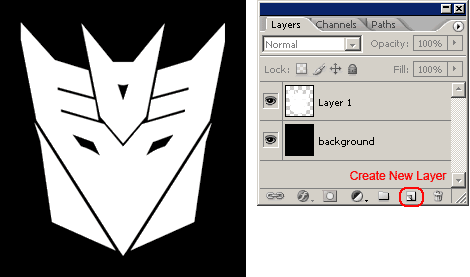
2. Open Photoshop. Choose File>Open. Open Decepticon EPS file. Use 350x400pixel, 72 dpi, RGB mode. From top menu, choose Image>Adjustment>Invert to change its color to white.
Enlarge canvas (Image>Canvas Size). Use 120 percents x 120 percents.
In Layers Palette, create new layer. Rename this layer 'background'. (To rename, just double click at layer name). Position this layer at the bottom. Fill this layer with black color.
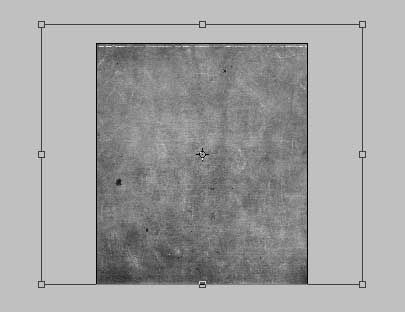
3. Open metal texture image and drag into document. Press Ctrl+T, then rotate and resize metal texture. When finished, press Enter.
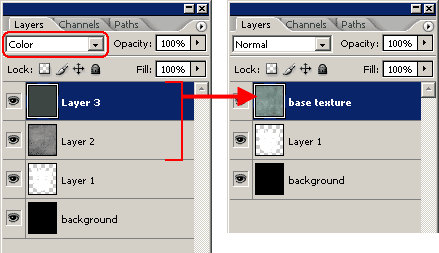
4. Next, we need to change texture color into greenish color. Create new layer. Fill with greenish color (R=54, G=75, B=70). Change its blending mode to Color.
Next, select both texture and color layer(hold Ctrl while selecting both layers), and right click at these selected layers. Choose Merge Layers. Rename this combined layer to 'base texture'.
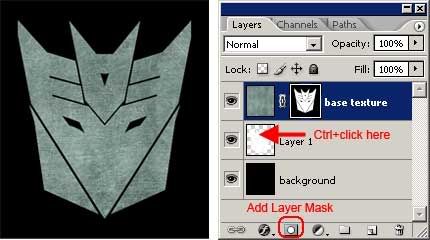
5. Make sure 'base texture' layer is selected. Ctrl+click at Layer 1 icon to load selection. Then click Add Layer Mask to create a masking.
1. Create new layer on top of other layers. Ctrl+Click at Layer 1 icon to load selection. From top menu Select>Modify>Contract. Use amount=4pixel.
Then fill selection with black ciolor.
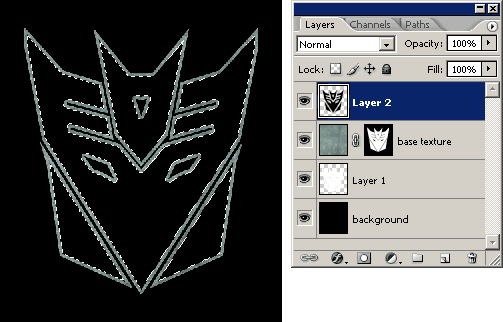
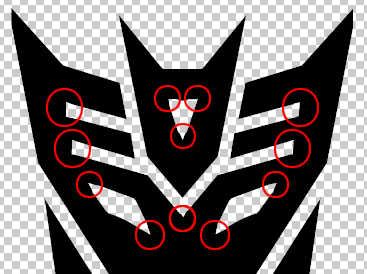
2.Turn off other layers's visibility (by turning off eye icon in Layers palette). So you can see this new layer clearly. After Contract, some sharp edges are rounded. Use Polygonal Lasso Tool to select some rounded areas and delete to make them sharp again. Below is several areas that need to be adjusted.
3. Next, select 'base texture' layer. Right click at this layer and choose Duplicate Layer. Rename the duplicate layer to 'top texture' and position this layer above.
In this duplicate layer, right click at layer mask icon, and choose Delete Layer Mask.
Make sure 'top texture' layer is selected. Ctrl+click at Layer 2 icon to load selection. and click Add Layer Mask button to create new mask.
Now you have 2 texture layer. Small one at top and bigger one at bottom.
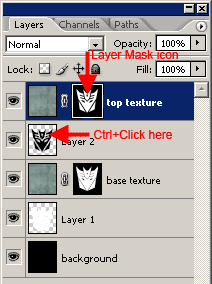
4. Ctrl+click at Layer 2 again to load selection. Create new layer, name this layer 'line'. From top menu Edit>Stroke. Use green color (R=54, G=75, B=70) with amount=2 pixel..
Next, you can delete Layer 1 and Layer 2.
The preparation is finished. Next step is adding some 3D depth to the logo.
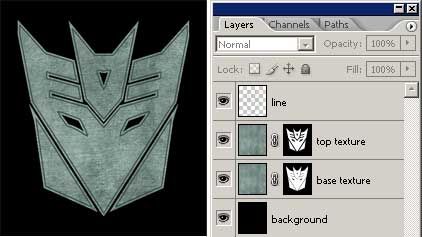
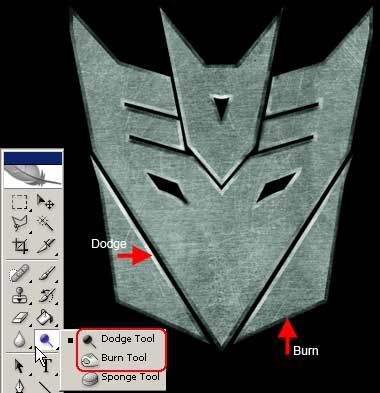
1. Select 'base texture' layer. Use Dodge Tool to add some highlight to edges area. Use Burn tool to add some shadows to edges area. Tips use several brush size. To increase or decrease brush size use [ or ].
Look at image below for example. If you do okay, the logo looks like a beveled 3D logo.
2.Select 'line' layer. Change its blending mode to Overlay with Opacity=50%. .
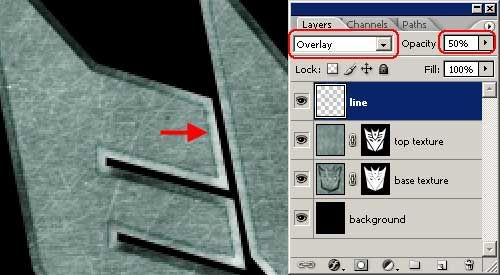
3. Next, select 'top texture' layer. Use large bruzh size to dodge and burn some aeras.

4. Final task is creating some scratch. Create new layer. Use Brush tool to draw some scratch. Use green color (R=54, G=75, B=70). Change its blending mode to Multiply.
To add more effect, you can also apply Filter>Artistic>Plastic Wrap.
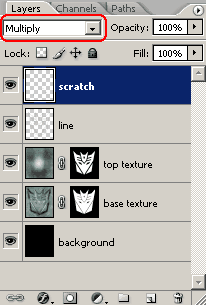
5. Image below show finished Metallic Transformers Logo.


No comments:
Post a Comment